

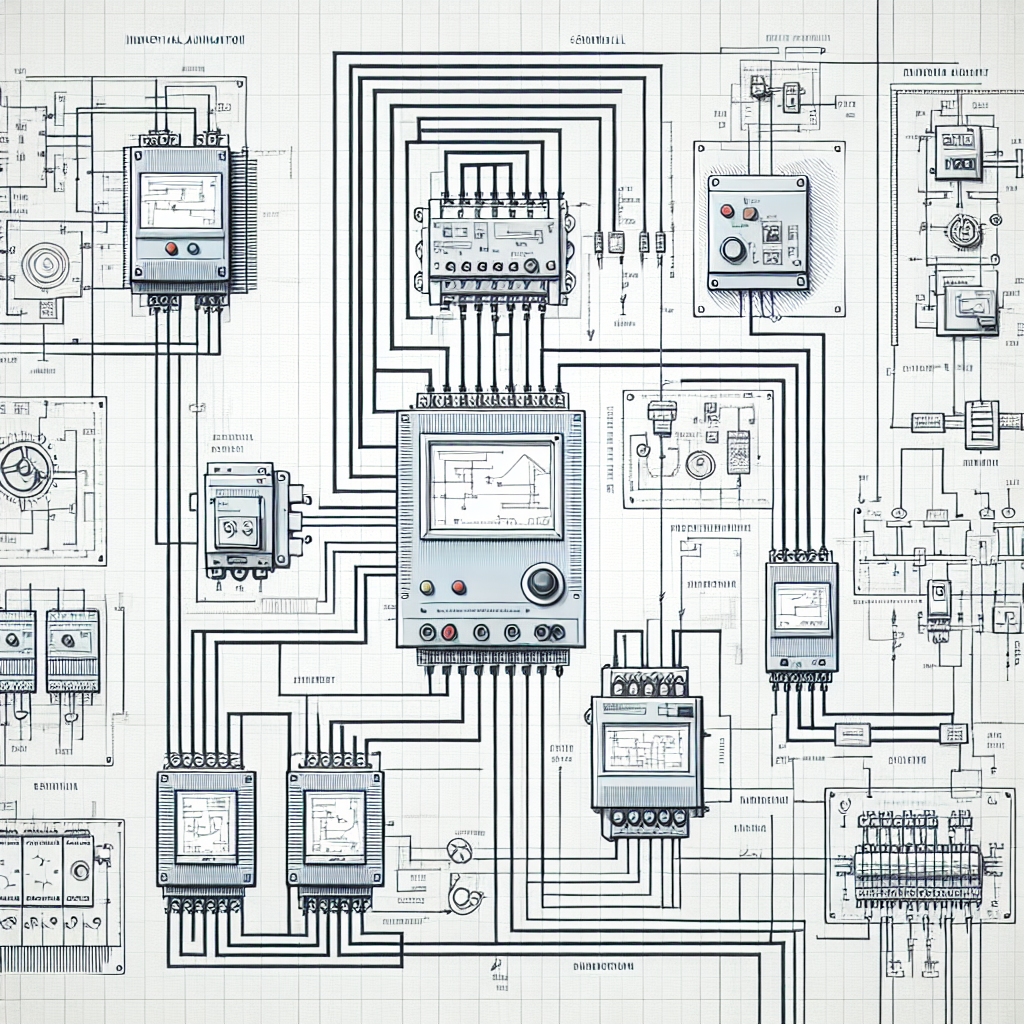
Introduction: Why Wiring Diagrams Matter
Wiring Diagrams are the unsung heroes of industrial automation. If you’ve ever been on the plant floor at 3 AM trying to figure out why a machine isn’t starting, you’ll appreciate the value of a good one. I remember one night, up against a looming production deadline, when a misread diagram almost cost us a whole shift. See, the thing about wiring diagrams is they can either be your best friend or your worst enemy.
Understanding these diagrams is crucial because they tell the story of your entire automation setup. When they’re well-done, they save you hours of troubleshooting and guessing work. A wiring diagram that clearly shows connections, power sources, and component interactions allows you to pinpoint issues much faster. However, common pitfalls like misinterpreting symbols or overlooking critical connections can lead to headaches and delays.
In my experience, a good wiring diagram can make the difference between a quick fix and an all-nighter. Whether you’re designing a new system or maintaining an existing one, effective diagrams are key to smooth operations. Trust me, the time you spend ensuring your wiring diagrams are accurate and comprehensive is time saved when something inevitably goes wrong.
Types of Wiring Diagrams in Industrial Automation
In the world of industrial automation, you’ll encounter several types of wiring diagrams: schematic diagrams, pictorial diagrams, and ladder diagrams. Each has its own purpose and utility, and knowing when to use each type is half the battle.
Schematic Diagrams
Schematic diagrams are the go-to for showing how components are electrically connected. Think of them as the logical map of your system. They don’t show physical locations but rather how signals flow within the system. This makes them incredibly useful for understanding the logic behind a circuit. For example, a schematic might clearly indicate how a Siemens S7-1200 PLC interacts with a VFD to control motor speed.
Here’s the thing about schematics: they don’t lie. But you need to know how to read them. I once spent an entire afternoon tracing a circuit that, on paper, was supposed to have a series of NO contacts. Turned out, the issue was a miswired NC contact that someone overlooked during installation. If I’d been more diligent with the schematic, I could’ve saved hours.
Pictorial Diagrams
Then there are pictorial diagrams. These show components as they appear to the eye rather than how they function internally. It’s like a blueprint showing where each component physically resides. While not as common in complex automation systems, they’re helpful when you need a visual overview of an installation, like when laying out control panels.
In my experience, pictorial diagrams are your best friend when explaining the layout to someone who’s new to the setup. We once had an intern who couldn’t grasp the layout until we handed him a pictorial diagram. That simple piece of paper turned his confusion into understanding.
Ladder Diagrams
Ladder diagrams, on the other hand, are specifically used for relay logic circuits. They resemble a ladder, with two vertical lines representing the power rails and horizontal lines showing the control circuits. I personally prefer ladder diagrams when working with older systems or when trying to troubleshoot relay logic, as they make it easy to follow the flow of current.
Funny enough, when you’re dealing with an older system that’s been “MacGyvered” over the years, ladder diagrams are often the only thing that makes sense. I remember a time when a legacy system was acting up. The ladder diagram quickly showed us that someone had bypassed a relay for a “temporary” fix that was still in place years later.
Each diagram serves a unique purpose. Schematic diagrams are for logical relationships, pictorial diagrams for visual orientation, and ladder diagrams for relay logic understanding. When you know when to leverage each type, you’ll find yourself solving problems more efficiently.
Key Components in Wiring Diagrams
Understanding the key components in wiring diagrams is fundamental. At the heart of these diagrams are symbols and notations, which represent every wire, connector, and device. If you can’t interpret these symbols, you’re in for a tough time. Trust me, I’ve been there.
Symbols and Notations
Symbols in wiring diagrams aren’t just squiggles. They’re the language of the diagram. You’ll see standardized symbols for everything from resistors to relays. For instance, a simple switch might be represented by a break in a line, while a relay coil is typically shown as a circle with a letter inside.
One time, I was training a new hire on reading symbols, and he kept confusing the symbols for a push button and a limit switch. It was a simple mistake, but it led to some wrong assumptions about the circuit’s operation. It just goes to show, you need to get these symbols right from the start.
Common Components: Relays, VFDs, PLCs
When it comes to components, you’ll frequently spot relays, VFDs, and PLCs in industrial wiring diagrams. Relays are used for switching, VFDs control motor speed, and PLCs are the brains of the operation. For example, a diagram might show a VFD connected to a motor, with the PLC sending control signals based on sensor inputs.
Relays are your basic on/off switch within circuits, and getting comfortable with their layout on a diagram can really speed up troubleshooting. If your motor isn’t running, check the relay contacts first. I’ve found that about 50% of the time, something simple like a stuck relay is the culprit.
Wiring Standards and Codes
The importance of adhering to wiring standards and codes can’t be overstated. Standards like IEC and NFPA ensure that your diagrams use consistent symbols and notations, making them easier to read and troubleshoot. Ignoring these can lead to confusion or even safety hazards. For instance, mislabeling a neutral wire could cause a dangerous short circuit.
Pro Tip: When working with wiring diagrams, always double-check that you’re following the relevant standards. It’s a simple step that can save a lot of trouble down the road.
Reading and Interpreting Wiring Diagrams
Reading and interpreting wiring diagrams is a skill that every engineer needs. Here’s a step-by-step guide to help you out.
Step-by-Step Guide
Start with the title block. It gives you the overview—what system the diagram is for, who drew it, and any revision notes. Next, identify the power sources and trace their paths through the diagram. Look for any switches, relays, or PLCs that could be influencing the circuit. Make sure you follow the flow of current logically through each component.
One time, I overlooked a tiny revision note in the title block that indicated a change in the control relay. That oversight cost us hours trying to figure out why the new setup wasn’t working. Pay attention to those details; they can be critical.
Common Misinterpretations
One common mistake is not differentiating between normally open (NO) and normally closed (NC) contacts. In my experience, this leads to many a headache. Also, don’t overlook the significance of dashed lines, which often indicate a physical or logical grouping not connected by conductors.
Honestly, I think dashed lines are misunderstood. They’re like the footnotes of wiring diagrams. They tell you there’s more than meets the eye. Pay attention to them.
Troubleshooting Tips
For troubleshooting, isolate sections of the diagram and verify them one at a time. If you’re dealing with a PLC system, simulate inputs and outputs to see how the system behaves. In my experience, most issues arise from overlooked connections or misconfigured parameters. So, keep your eye on those every step of the way.
Troubleshooting Tip: If you’re stumped on a problem, take a break, then look at the diagram with fresh eyes. Sometimes, staring too long at a problem blinds you to the solution.

Understanding wiring diagrams is both an art and a science. The more you practice, the more intuitive it becomes. Remember, these diagrams are your roadmap to the entire automation system, so mastering them is key to your success as an industrial automation engineer.
Creating Effective Wiring Diagrams
Best Practices
When it comes to creating effective wiring diagrams, clarity is king. Trust me, there’s nothing worse than trying to decipher a mess of lines and symbols at 2 AM when the line is down. So, make sure you use consistent labeling for all your components, wires, and connections. Define your symbols clearly in a legend and stick to them. Furthermore, organize your diagram logically, following the flow of the electrical system. This helps anyone who looks at it to get a quick understanding.
Another thing to keep in mind is to avoid over-complicating details. While details are necessary, too much clutter can obscure critical information. Use layers or separate sheets for different systems if you’re working on something big or complex. Moreover, always document any non-standard wiring or unique setups. It’ll save headaches later.
Over the years, I’ve discovered that the best diagrams are those you can explain over a cup of chai. If it takes more than that, you’re probably overcomplicating things.
Tools and Software
Now, let’s talk tools. There are plenty of software options out there for creating wiring diagrams. Personally, I’ve found AutoCAD Electrical and EPLAN to be very effective. These tools offer robust libraries of components and symbols, which means you won’t spend time drawing the same items over and over. Additionally, they support error checking features that can catch potential issues before they become real problems.
However, if you’re just starting out or have a smaller budget, there are free options like TinyCAD and QElectroTech that can get the job done. The key is to choose software that you’re comfortable with and that integrates well with the rest of your workflow.
Once, we had a project where the budget was tight, and we used TinyCAD. It was a bit of a learning curve, but it got the job done. Your tool doesn’t have to be expensive; it just has to work for you.
Collaboration with Team Members
Here’s the thing, wiring diagrams shouldn’t be a solo effort. You need to collaborate with your team. This means sharing drafts and getting feedback. In my experience, fresh eyes can catch things you might have missed. Moreover, involving your team ensures everyone is on the same page, literally and figuratively.
Use tools that facilitate this collaboration. Cloud-based solutions or software with version control features can be a lifesaver. They help track changes and ensure that everyone’s working with the most up-to-date diagrams. Furthermore, regular team discussions about wiring diagrams can foster a culture of continuous improvement and knowledge sharing.
Honestly, I think one of the best ways to iron out potential issues is through a “diagram review pizza party.” Get the team together, go through the diagrams, and make it a fun, engaging process. It’s amazing what a slice of pizza and a fresh perspective can do.
Common Mistakes to Avoid
- Misreading Symbols: It’s easy to mistake one symbol for another, especially if you’re in a rush. Always double-check your legend and take your time to ensure you’re reading it correctly. Misreading a symbol can lead to incorrect wiring, which is the last thing you want.
- Ignoring Revisions: Revisions can be small, but they’re important. A change in a relay or a contact can affect the entire circuit. Always check for the latest version of the diagram before proceeding with any work.
- Overcomplicating Diagrams: Too much information can be as bad as too little. Keep diagrams as simple as possible while still conveying all necessary information. Use layers or separate sheets for complex systems to avoid clutter.
- Skipping Standards and Codes: This is a big one. Standards exist for a reason. They ensure safety and consistency. Always adhere to the relevant codes and standards like IEC and NFPA to avoid safety hazards and ensure reliability.
- Failing to Collaborate: Two heads are better than one. Failing to review diagrams with team members can lead to missed errors. Collaboration helps ensure diagrams are accurate and comprehensive.
Case Study: Real-World Wiring Diagram Challenges
Problem and Solution
Let me share a real-world scenario. A few years ago, we were working on a project involving a Siemens S7-1500, and everything was going smoothly until we hit a snag with the wiring diagrams. We had a miscommunication between the design and the installation teams, leading to several incorrect connections on site. It threw the whole commissioning schedule off.
So, what did we do? We went back to basics. We gathered all stakeholders in a room, brought out the wiring diagrams, and went through them wire by wire. It was tedious, but we caught multiple errors. Once we had things straightened out on paper, we went back to the floor and fixed the physical wiring. It taught us a valuable lesson about the importance of detailed cross-checking and communication.
Lessons Learned
This experience drilled home the importance of clear documentation and collaboration. One key takeaway was the need for a robust review process involving multiple team members before finalizing diagrams. Additionally, having regular cross-department meetings during the design phase can preempt these issues. The way I see it, the more eyes on a wiring diagram, the better.
Moreover, this incident emphasized the need for a solid feedback loop. Installation teams need to have a direct line to the design team to report errors or suggest improvements. This builds a culture of trust and collaboration, making future projects smoother and more efficient.
Frequently Asked Questions
What are the most important things to check in a wiring diagram?
You’ll want to ensure that all components are correctly labeled and all connections are accurately depicted. Double-check the current flow and confirm that the diagram aligns with the actual physical layout. Consistency is key, so verify that you’ve used standardized symbols throughout.
How do I choose the right type of diagram for my project?
This depends on your project’s complexity and requirements. For simple systems, a basic schematic might suffice. However, for larger setups, you may need detailed wiring and layout diagrams. Consider what will be most useful for installation and troubleshooting later on.
What software is best for creating wiring diagrams?
AutoCAD Electrical and EPLAN are industry standards due to their extensive libraries and error checking capabilities. However, for more budget-friendly or simpler needs, tools like TinyCAD or QElectroTech can be effective. Choose something that fits your workflow and team collaboration needs.
How can I effectively troubleshoot using a wiring diagram?
Start by isolating the section of the diagram related to the fault. Check for continuity or incorrect connections. Use the diagram as a roadmap to trace the issue physically in your panel or system. Cross-reference with other diagrams if needed to get a full picture of potential issues.
Can I create wiring diagrams without professional software?
Yes, you can. While professional software provides advanced features and libraries, you can use basic tools like drawing software or even manual sketches for simple diagrams. However, for complex systems, professional tools save time and enhance accuracy.
What’s the best way to update wiring diagrams after modifications?
Always update diagrams immediately after any changes. Use version control to track changes over time. Ensure all stakeholders have access to the latest version to avoid confusion and ensure safety. Regular updates prevent outdated information from circulating.
Key Takeaways: Quick Reference
Effective wiring diagrams are clear, consistent, and collaborative. Use standardized symbols and logical layouts. Involve your team for reviews to catch errors early. Choose software that suits your needs, whether it’s AutoCAD Electrical, EPLAN, or something simpler. Always keep communication open between design and installation teams to avoid costly mistakes.
Here’s a quick checklist for your daily work:
- Ensure all components and wires are labeled clearly.
- Use consistent symbols and document any variations.
- Double-check connections against the physical layout.
- Involve team members in reviews for a second opinion.
- Keep all project stakeholders informed and engaged.
In my experience, mastering wiring diagrams is an ongoing learning process. You’re not going to get everything right the first time. But by following these practices, you’ll definitely reduce headaches down the road. So, next time you’re elbow-deep in a panel, remember these tips and take a moment to appreciate how a good wiring diagram can save your day. If you’ve got any more questions or want to share your own wiring diagram war stories, drop a comment below or reach out. Let’s keep learning and improving together — after all, that’s what industrialgyan.com is all about!

I am an electrical & automation engineer with extensive experience in Design, PLC programming, SCADA development, and IoT integration. I have a strong background in the industry, focusing on the Design & Development of Hardware, Software &Industry 4.0 technologies, and the integration of intelligent manufacturing systems.
I have a deep understanding of electrical principles and am proficient in various programming languages, including Ladder Logic, Structured Text, and Python. In addition, I have experience with various PLC, SCADA & IoT technologies and a track record of successful integration projects for various clients.